We can migrate our website from one server to another server. It is always a tedious task to get your website successfully transferred from one host to another. A successful website transfer is one which moves your fully functional website to another host with zero downtime. Moving a website to another host consists of the following steps:
- Moving the website’s files.
- Moving the website’s database.
- Pointing your domain’s DNS to the new host.
In the Post https://amitsblog.xyz/wp/2018/05/27/host-a-website-in-home-pc-using-jiofi3/ we discuss how to host website in your home PC. There are many disadvantages of hosting website in home PC e,g. You need static IP, otherwise you will have to update new IP in DNS, upload speed is much lower than the download speed, risk of downtime.
You can use windows VPS to migrate your website. Window VPS is costly. There is an alternate, you can use OpenVZ which are much cheaper than windows VPS. Many companies offer OpenVZ VPS at 8 $ per year with 640 MB RAM.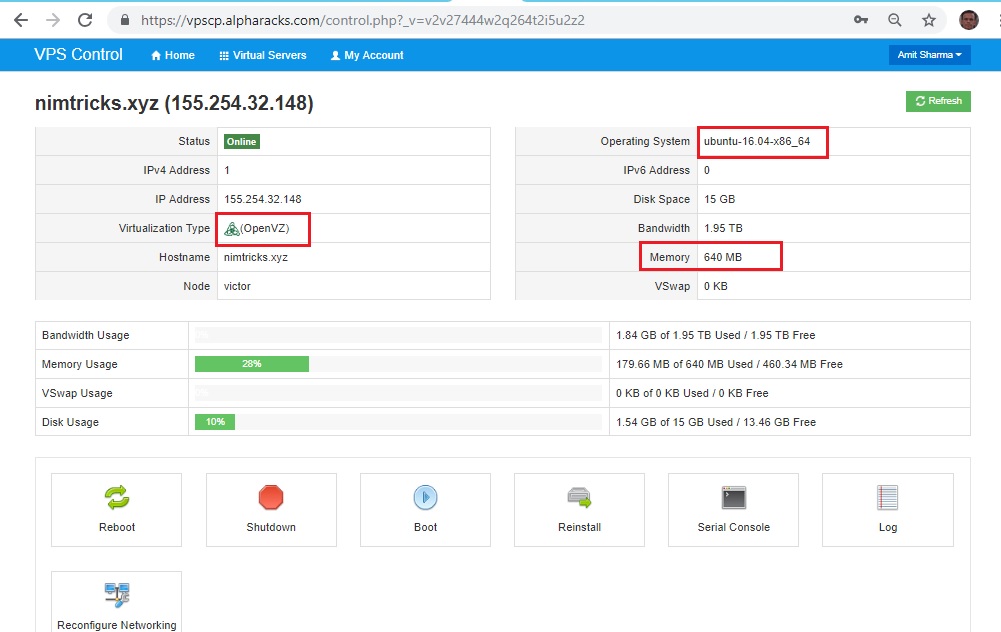
Here we discuss to migrate website to OpenVZ. Steps are as follows:
- Take Backup of your website files.
- Open phpmyadmin and select Export tab and export databases from the current server.
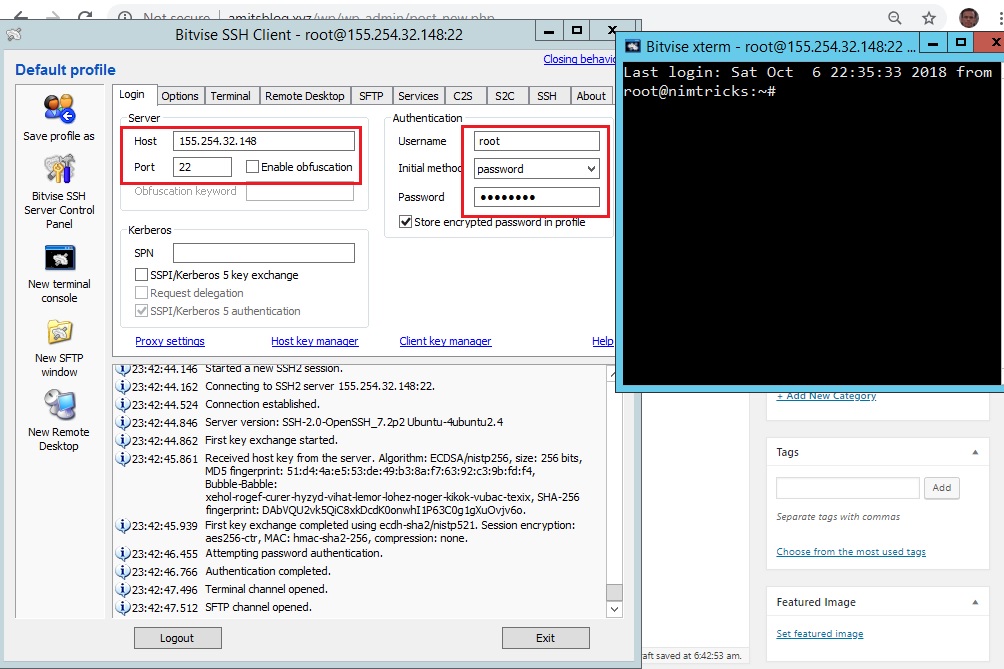
- Use Putty or Bitvise SSH Client to open OpenVZ VPS.
- Although OpenVZ already comes preinstalled with a fully working LAMP stack. But if its not preinstalled use following command to install LAMP :
apt-get update
apt-get upgrade
apt-get install apache2
- After the installation is complete, you should start and enable Apache to start automatically upon server reboot with:
systemctl start apache2
systemctl enable apache2
To check the status of your Apache server and make sure it is up and running, you can run the following command:
systemctl status apache2
- To install the MySQL Database server, use the following commands :
apt-get install mysql-server
During the installation, you will be asked to enter a password for the MySQL root user.
Now start the database server and enable it to automatically start upon boot, with:
systemctl start mysql
systemctl enable mysql
- Now install PHP using command :
apt-get install php7.0 libapache2-mod-php7.0 php7.0-mysql php7.0-curl php7.0-mbstring php7.0-gd php7.0-xml php7.0-xmlrpc php7.0-intl php7.0-soap php7.0-zip
In order to test if PHP is working properly, we can place a file called info.php inside your Apache web server root directory (/var/www/html/).
You can create the file with the nano text editor:
nano /var/www/html/info.php
Enter the following content inside the file and save it:
<?php
phpinfo();
?>
Finally, restart the Apache server by typing:
systemctl restart apache2
Enter http://your_server_ip_address/info.php in your web browser, and you will see the PHP configuration page.
- Open http://your_ip/phpmyadmin and create a DATABASE. Use same name as used in home PC.
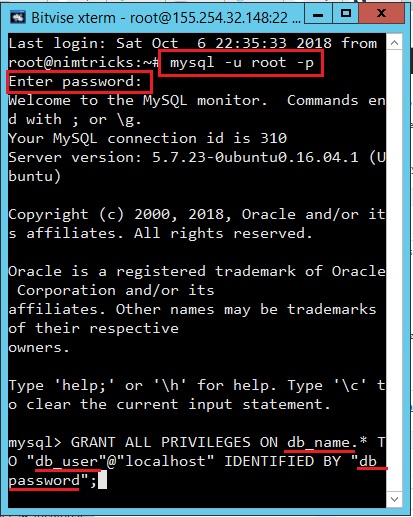 Once the database is created, and open mysql using command
 mysql -u root -p, When prompted, enter the root password you assigned. Use the command GRANT ALL PRIVILEGES to create a new user (Use same name used in previous) with ALL privileges.
GRANT ALL PRIVILEGES ON db_name.* TO “db_user”@”localhost” IDENTIFIED BY “db_password”;
* Replace db_name, db_user, db_password with your parameters used earlier.
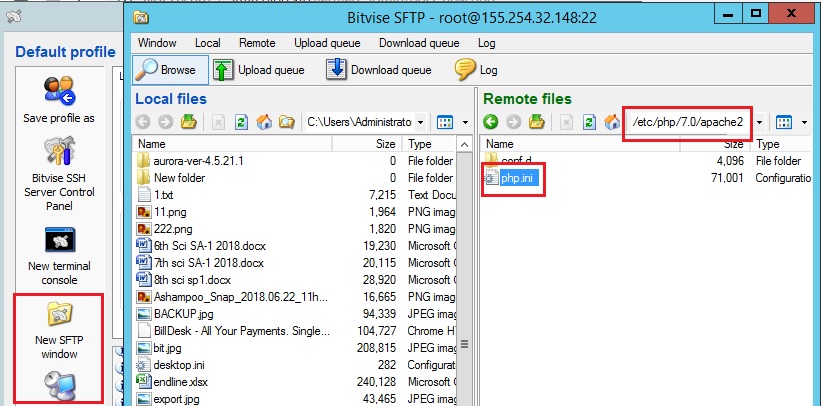 You may need to change the maximum upload file size for PHP scripts if its size is larger than permitted size. Open SFTP and open php.ini file in /etc/php/7.0/apache2 and open it with notepad++. Now replace size with upload_max_filesize = 20M
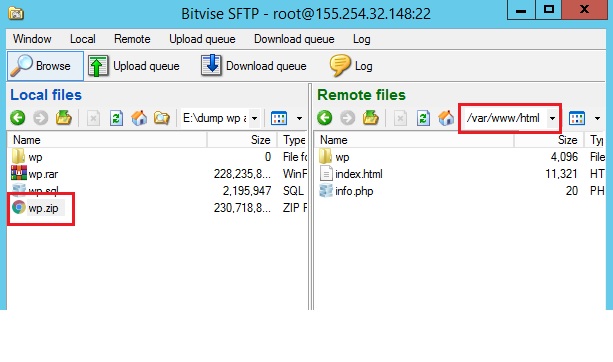
post_max_size = 21M.- Open phpmyadmin and select IMPORT tab and import database downloaded from the previous server.
- Export All backup website files to /var/www/html and unzip it in html folder.
 Now you need to update your ip address to DNS server. Once updated, open your browser and enter ip address. Your website is successfully migrated to OpenVZ.