One of the great things about WAMP is that it allows us to switch between different versions of PHP. In WAMP 2.5 version of PHP is 5.5.12. WordPress has officially ended support for PHP 5.2 – 5.5 and bumped its minimum required PHP version to 5.6.
With WAMP we can upgrade PHP version from 5.5.12 to 7.1. 9 Following are the steps to configure the latest PHP 7 on your local system.
- Download the zip file for the version of PHP 7.1.9 for Windows.
- Locate to your WAMP directory, (usually C:/wamp). Goto C:/wamp/bin/php and create a new folder “php7.1.9″ and extract the contents here.
- Now, navigate to your old php folder. (mine php5.5.12), and copy php.ini, phpForApache & wampserver.conf files and paste it to your “php7.1.9″ folder.
- Open php.ini and search for 5.5.12
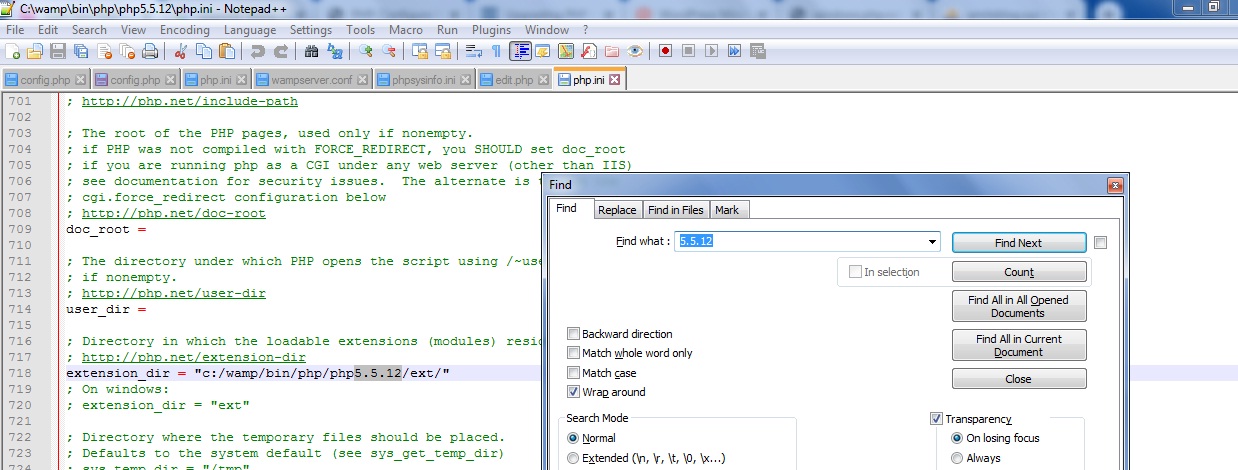 Replace 5.5.12 with 7.1.2. Press find next and replace zend_extension = “c:/wamp/bin/php/php5.5.12/zend_ext/php_xdebug-2.2.5-5.5-vc11.dll” with zend_extension = “c:/wamp/bin/php/php7.1.9/zend_ext/php_xdebug-2.2.5-5.5-vc11.dll”
 - Similarly open phpForApache file and do replacements.
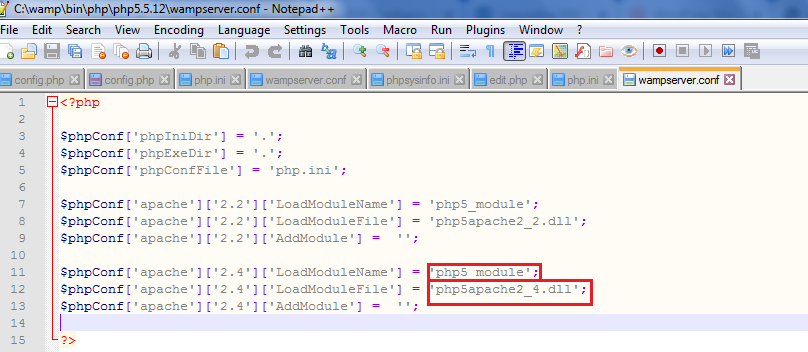
- Open wampserver.conf file and replace php5_module with php7_module & php5apache2_4.dll with php7apache2_4.dll.
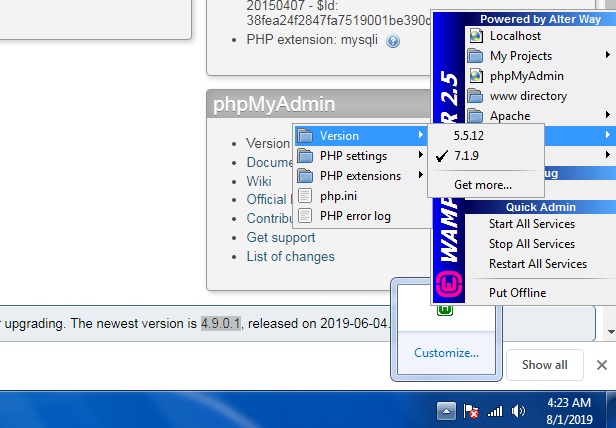
- Exit WAMP entirely and restart it and select the version of PHP 7.1.9 from the PHP Version menu in WAMP.
- Open your localhost and check PHP version.
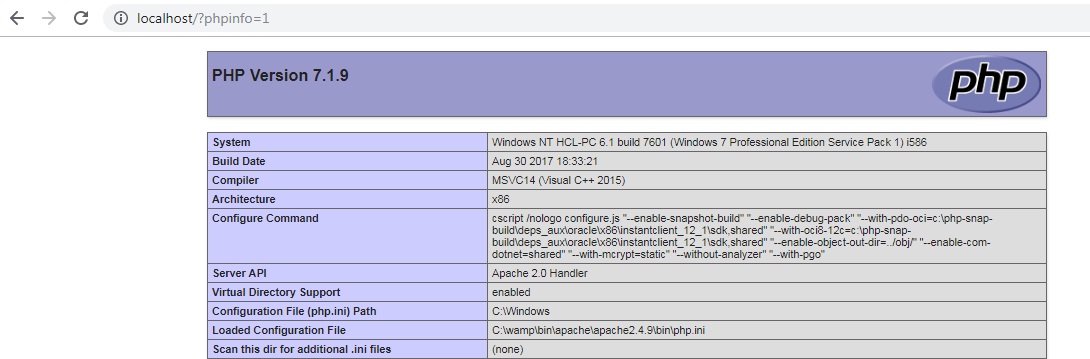 That’s It. PHP version updated.